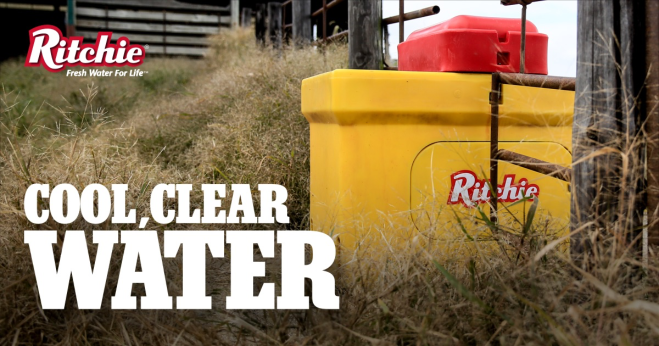
How to clean a Ritchie Waterer
Spring is here and with Spring comes spring cleaning. This is the time of year that we receive a lot of questions for tips on how to clean a Ritchie Waterer. We recommend that cleaning is done about every 3 days on our open trough units or as needed. The more often you clean, the easier future cleanings will be. Below is a summary of tips that can be used when cleaning.
Tools that you will need:
Scrub brush or towel
For added clean, animal safe cleaners can be used*
EcoFount Series
The EcoFount series features a cover that will help prevent a lot of debris from blowing into the trough area. This helps when cleaning its stainless steel trough.
- Step 1: Remove the wingnuts and flip open the cover
- Step 2: Remove floating disc(s)
- Step 3: Remove drain plug/overflow pipe to allow water to drain Tip: Hold float in up position to prevent water from running as the trough drains. You can also shut water off to the unit if shut off valve was installed under the waterer.
- Step 4: Scrub or wipe the trough clean allowing debris to drain out of the drain hole.
- Step 5: Allow water to run as you rinse the trough. (You may need to turn the water source on if previously turned off)
- Step 6: Replace drain
- Step 7: Replace the floating disc(s)
- Step 8: Lower trough and secure with wingnuts.
- See Video – How to clean a Ritchie EcoFount waterer
Open trough units – CattleMaster, OmniFount, WaterMatic, WaterMaster series
The CattleMaster and OmniFount series are designed with our fully insulated poly casing and stainless steel trough with overall heat coverage. The WaterMatic and WaterMaster series are one piece, all plastic units. They often feature optional heat in northern climates.
For quick, frequent cleaning
- Step 1: Remove the top valve chamber cover
Water Seal Groove
- Step 2: Clean debris from the water seal groove found at the top of the chamber.
- Step 3: Remove drain plug Tip: Hold float in up position to prevent water from running as the trough drains. You can also shut water off to the unit if shut off valve was installed under the waterer.
- Step 4: Scrub or wipe the trough clean allowing debris to drain out of the drain hole.
- Step 5: Allow water to run as you rinse the trough. (You may need to turn the water source on if previously turned off)
- Step 6: Replace drain plug and tighten drain plug wingnut if necessary.
- Step 7: Replace valve chamber cover and allow waterer to fill.
Optional – If you have the optional heat installed in either the WaterMatic or Water Master series units, remove the Immersion Heater, wipe clean and store until the fall.
Stall Fount Series – Stall Fount and Stall Fount II
The Stall Fount series offers a flush mount, 304 Stainless steel waterer and a corner mount, combination fully insulated plastic and stainless steel waterers.
Stainless Steel Stall Founts
- Step 1: Unscrew the bolt that secures the flip to access cover
- Step 2: Remove drain plug – This may require an extra tool to push the plug up into the trough
- Step 3: Hold float in up position to prevent water from flowing
- Step 4: Allow trough to drain. Use bucket to collect water if necessary
- Step 5: Scrub or wipe the trough clean allowing debris to drain out of the drain hole
- Step 6: Release float and allow water to flow to rinse trough
- Step 7: Replace drain plug and allow trough to fill
- Step 8: Secure access cover with bolt
Stall Fount II – corner mount options
- Step 1: Unbolt and remove stainless steel ring
- Follow steps 2-8 above
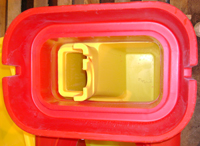
All Plastic, Covered Units – Thrifty King Series and Thrifty King for Swine
The Thrifty King Series can be used energy free under the right circumstances however additional heat may be added if needed. The Thrifty King series requires the removal of the entire red cover for a good clean.
- Step 1: Remove the top valve chamber cover
- Step 2: Clean debris from the water seal groove found at the top of the chamber.
- Step 3: Remove entire red top by removing bolts
- Step 4: Clean debris from the water seal groove under red top
- Step 5: Remove drain plug. Pressure from the water in the take may require additional tools be used to push the drain plug into the trough. Using a dowel or broom stick handle to push the drain plug may be necessary. Tip: Hold float in up position to prevent water from running as the trough drains. You can also shut water off to the unit if shut off valve was installed under the waterer.
- Step 6: Scrub or wipe the trough clean allowing debris to drain out of the drain hole.
- Step 7: Allow water to run as you rinse the trough. (You may need to turn the water source on if previously turned off)
- Step 8: Replace drain plug.
- Step 9: As tank fills, replace red top and then red valve chamber cover
Thrifty King for Swine
- Step 1: Unbolt red cover and remove
- Follow step 5-8 above
- Replace red top as trough fills.
If you have any questions regarding the cleaning of your automatic waterers, you are more than welcome to contact us at 800-747-0222, chat live with us 7:30-4:00 M-F CST or email us at info@ritchiefount.com.
*Contact your vet for animal safe cleaning solutions.